Are you unsatisfied with the Starlink WiFi router? I felt the same when it left several WiFi dead spots in my house. Thankfully, we can bypass it and use a third-party router or mesh WiFi. In this article, I will explain how to do so.
Before proceeding, make sure that you have all the below requirements ready:
- An active Starlink internet connection
- An aftermarket router or mesh system
- Starlink ethernet adapter (If you haven’t already, please order it from shop.starlink.com)
- A laptop, desktop, or a smartphone
- An ethernet cable (of the desired length)
- Power extension box or adapter (optional)
Note: While Starlink is a simple satellite-based connection, having the latest wireless router can future-proof your network and improve the experience. Check out my recommended WiFi routers and mesh systems for Starlink.
With that out, Let’s dive into the process.
Contents
Step 1: Enable Starlink Bypass Mode
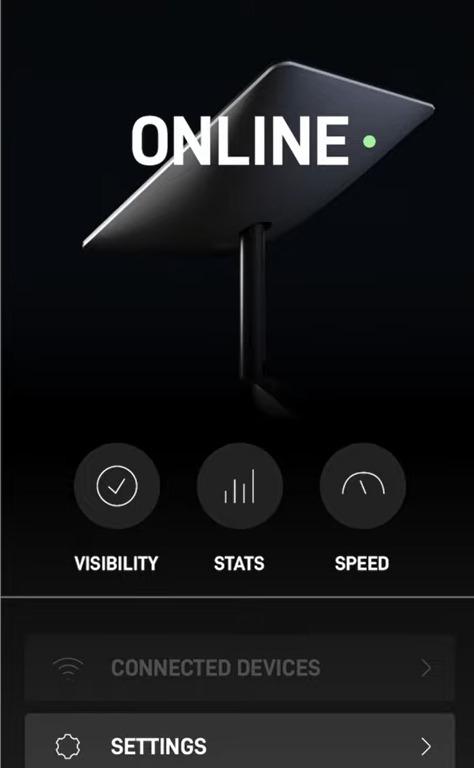
- Open the Starlink App on your mobile and login to your account. Once you’re in, you’ll see the device’s status in your app.

You’ll be able to see the details of the device connected to the satellite.
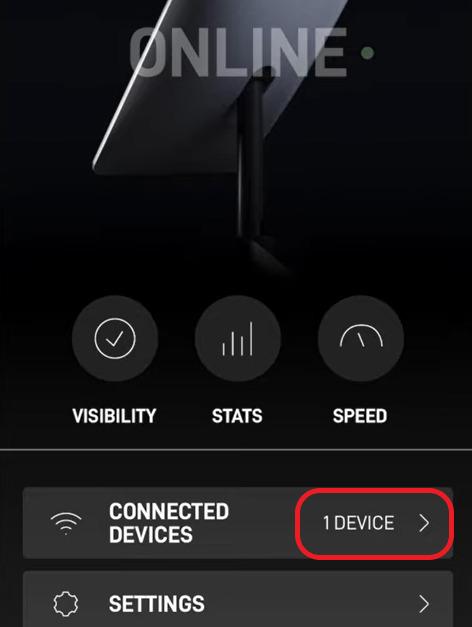
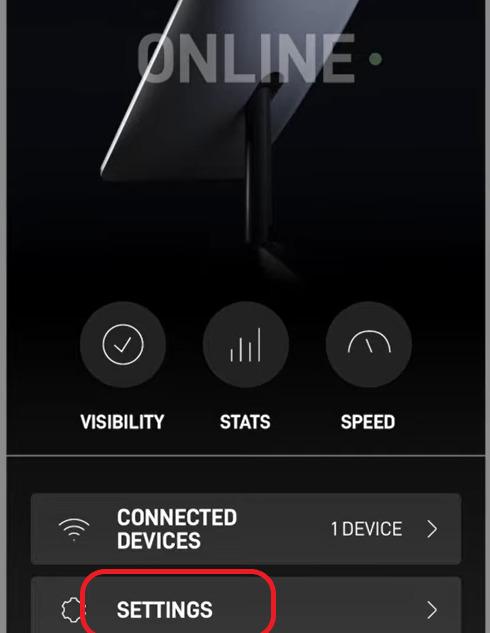
- Click on the settings menu below the connected devices

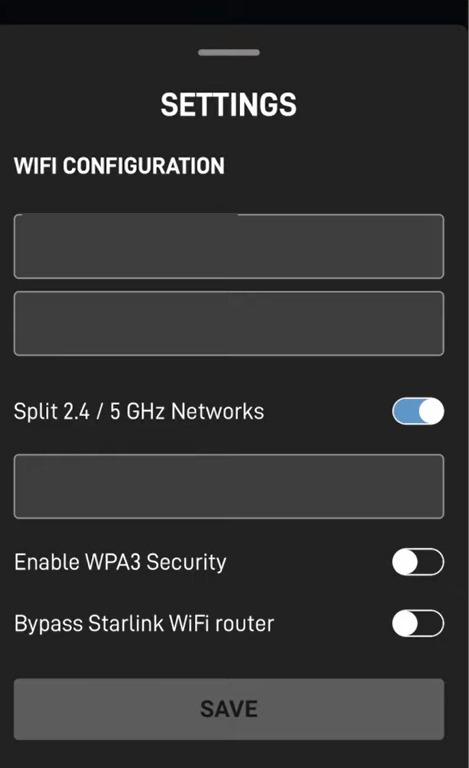
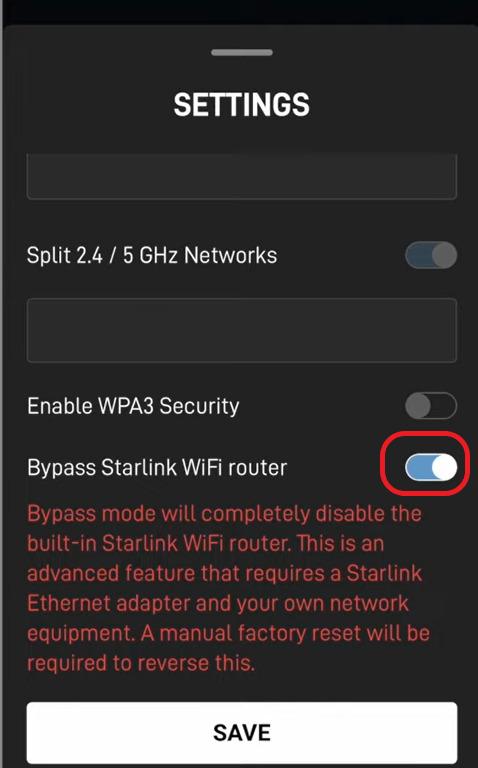
The settings page will look like this:
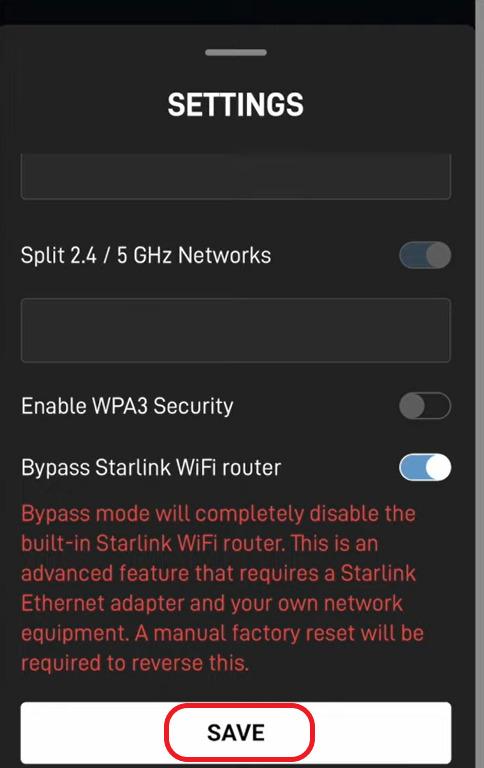
- Toggle on the “Bypass Starlink WiFi router” setting.

- You’ll see a warning that you are disabling the Starlink router. Click save.

Voila! This should let you install and set up your own routing device. But this is not it. You must follow several other steps to make it functional. Keep reading.
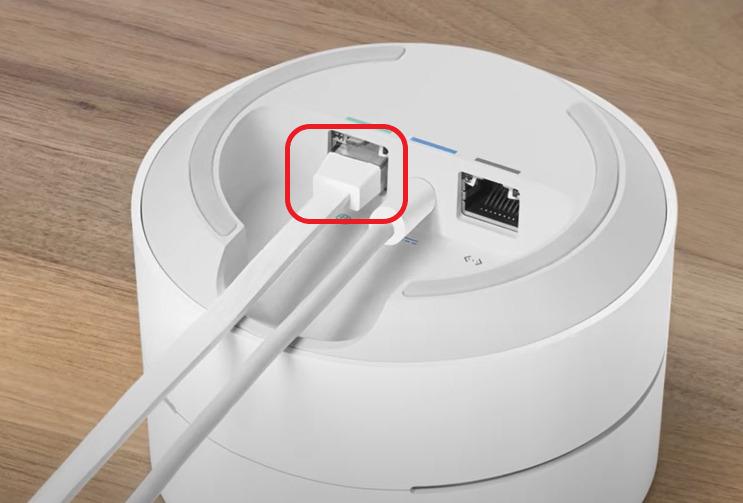
Step 2: Connect Starlink Ethernet Adapter
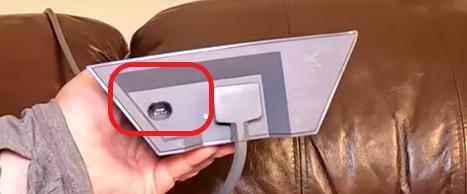
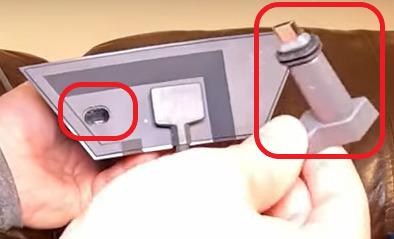
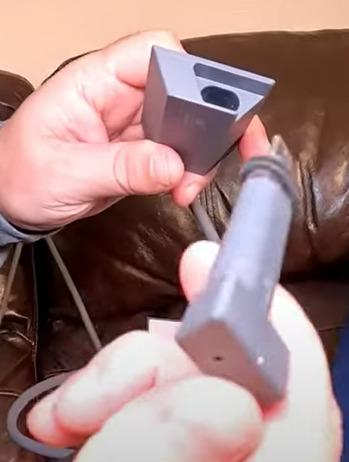
The ethernet adapter has to be connected to your Starlink router, as shown in the picture below.
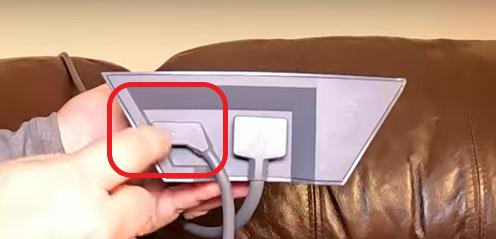
- Remove the input from the satellite dish as highlighted below.

- Insert one end of the Ethernet adapter into the Starlink router.

- Now, connect the satellite input to the Ethernet Adapter.

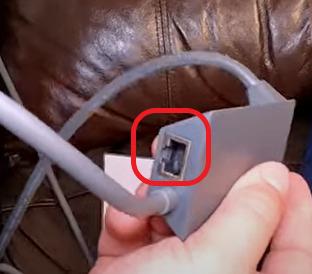
- On the other end of the adapter, you’ll find an Ethernet port. You’ll use an Ethernet cable to connect the adapter to the WAN port of your Mesh WiFi.

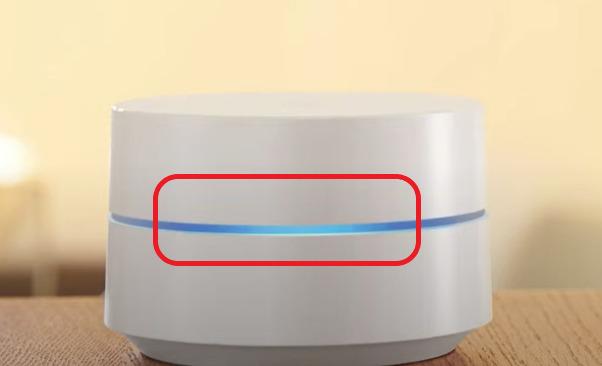
Step 3: Connect Router or Mesh WiFi
As mentioned earlier, you can use any router or mesh WiFi with your Starlink connection. For demonstration, I have used Google WiFi.
Now, let’s get going.
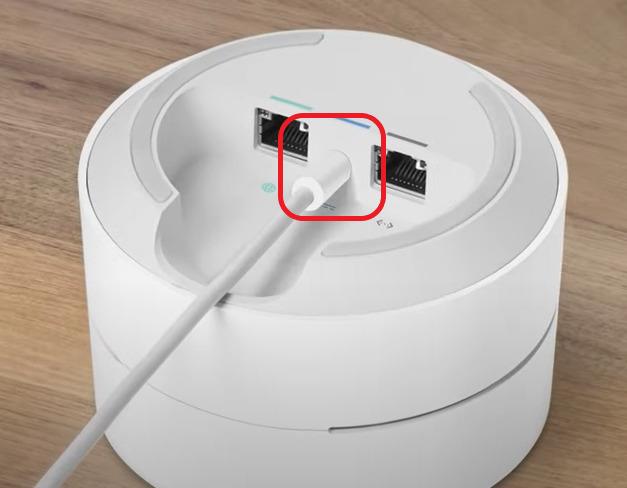
- Find a central location for the router and place it on a table a few feet above ground level. Next, plug in the power cable in the power slot.

- Connect the other end of the Ethernet cable from the Starlink Adapter to the Ethernet port.

- Plug the power cable into the nearest power outlet.

- Turn the device on, and you will find the router’s status lights blinking.


Note: You can complete the setup either in the mobile app or web portal, depending on the product. You may read the product manual for more clarity.
Once you connect Starlink to the mesh network, use the dedicated app or platform to control your home network. That opens up a plethora of customization and advanced setups to tweak your settings and get the most out of your network.
For those using an older version of the setup, connecting a router is even easier. You just need to detach the Starlink router from the adapter and connect your unit directly using an ethernet cable. All the other steps remain the same.
Frequently Asked Questions
Yes, you can. Look for ones with ethernet ports. But keep in mind that by using an extender, you are bound to miss out on the bandwidth because of an additional wireless hop. Anyway, I’ve tested a couple of units and reviewed some reliable extenders to use with Starlink.
Yes, Eero, Google, or any other mesh system or wireless router works with Starlink. There’s no compatibility quotient here.
No, the Starlink cable and its ports are proprietary. Alternatively, you can use a WiFi to Ethernet adapter, but you won’t be able to get the most out of the capacity. Starlink ethernet adapter price is $20, which costs less than a decent ethernet adapter. Therefore, it’s better to stick with the ISP’s adapter.
Conclusion
Hopefully, you were successful in installing Starlink and pairing your own router. You should notice a significant improvement in your network. If you have any further questions or suggestions, please comment below. Thank you for reading my article.
How can I connect my Phillips hue hub to my new Starlink satellite or stark link mesh? I’m not tech savvy but can follow most instructions.
Hey Judy,
It is fairly simple and won’t be different from any other WiFi.
They’ve written a step-by-step guide on the same.
I hope this helps. If you’ve any specific query, feel free to reply.
Thank you Kurt Twain for responding to my questions! It looks very easy to set up.
You’re awesome.
Judy
It’s all set up and working! Thanks again Kurt Twain
Judy
Hi Kurt,
Great article and thank you for explaining it all so well, especially the note about the Gen 1 Star link system.
I will take your advice on the TP Link system, the only addition I will make is an outdoor AP as well.
Thanks again.
Pete
Thanks. Simple and straight forward. Installed Google and 2 access nests. Had to reset the Starlink router because I didn’t bypass the Starlink router BEFORE setting up the Goggle mesh network. After being blocked by Starlink and re-setting my password twice, I finally reset the Starlink router (unplugging and re-plugging 6 times) let it do its thing and re-connected the Ethernet adapter and my google wifi network was there as I set it up and re connected. Sweet! My Starlink app does not have much informational functionality now though.
I have bypassed my Starlink but have issues when there is a power outage which can be frequent. When power comes back I lose internet because my router comes up before Starlink and does not get an address on the WAN side. This is a rural location and I am not there in the winter. So someone has to go in and restart my router AX-11000
Can I use Starlink router then piggy back my router to try and avoid this?
Hey Frank,
I understand your concern. Why not try a UPS battery backup device?
I think that would be a great addition unless power cuts in your area stay for too long.
Do you recommend using a switch?
Hey KH,
It depends on the use case. My setup doesn’t require a lot of wired connectivity, and hence I don’t use it.
I posted a question yesterday, but don’t see it here
So perhaps something went wrong and I’ll post it again.
Since two weeks I use Starlink (living in an area with poor connection) and this works very well, but better with a Mesh system.
I connected my old Google WiFi (two devices) without any problems.
But this house is quite big so I decided to buy a 3-pack of Google WiFi.
And here starts the problem: they don’t connect to the mesh-system.
I already was 1,5 hour working with the Google helpdesk, no success.
The i saw this article. I changed the router setting to ‘bypass’, but makes no difference.
Any suggestions to make this work?
Kind regards,
Gerard
Hey Gerard,
That’s a strange situation to be in. Are you sure the third Google WiFi point isn’t a faulty device?
Try replacing it. I hope this works.
Hi Kurt,
All three of my new Google Mesh give me the message: can’t connect
How to check if a Google Wifi-point is a faulty device. Perhaps to make one of them the router, connected by a cable with the Starlink modem?
I put one of the new devices on cable, in connection with Starlink router. But it gives no connection. Then i reset all the factory settings, and again: no connection.
So now im back with my to older Google Wifi devices (they work fine!), but my 3 new devices don’t make connection. My Google-app finds them, I scan the QR-code, then he starts to make a mesh-connection and tells me there is no connection.
This drives me crazy 🙂
Hope you have any idea
I have a Starlink V2, with WiFi still on and three additional secondary Starlink nodes in mesh. On one of the secondary Starlink nodes I connected an ethernet adapter then connected a Netgear Managed switch for my hardwired devices. I configured the switch with the Starlink gateway settings and everything works fine. Family NAS (hardwired) accessible from devices connected to StarlinkWiFi nodes. Wireless printer accessible from hardwired computers. It’s all been great.
Hi Kurt,
We purchased the Starlink kit early this summer for use at our remote cabin. The Starlink router was defective and sent back. Waiting 2+ months for Starlink to replace it! My question is: do you have to have the actual Starlink router for your recco’s in using the other routers you list? Said another way- we need internet to work remote- am I understanding that we do NOT need the Starlink router and can purchase another type of router to work with Starlink? Hope this makes sense as I am not one bit tech savvy! Thank you!
Hey Lori, Yes, you’ll need a Starlink router.